
Quick commerce is revolutionizing the way India shops. With customers demanding delivery in minutes rather than days, platforms like Blinkit have become essential channels for brands. If you are a brand owner or local retailer looking to expand your digital footprint, learning how to sell on Blinkit is no longer just an option—it is a necessity for staying competitive.
Navigating the Blinkit seller onboarding process can seem daunting at first, but with the right strategy, it opens the door to millions of hyper-local customers. This guide will walk you through everything from the Blinkit seller requirements to optimizing your listings for maximum visibility.
Why You Should Sell on Blinkit Today
Blinkit (formerly Grofers) has transformed from a standard online grocer into a rapid-delivery powerhouse. As a Blinkit online grocery delivery platform partner, you gain access to a high-intent audience that values speed and convenience.
Unlike traditional ecommerce where shipping takes days, Blinkit utilizes a network of "dark stores" to fulfill orders instantly. For sellers, this means faster inventory turnover and higher customer satisfaction. Whether you deal in packaged foods, personal care, or household essentials, the Blinkit marketplace onboarding process is your gateway to the instant delivery economy.
Eligibility Criteria and Required Documents
Before you begin your Blinkit seller account setup, it is crucial to ensure you meet the operational and legal standards. Blinkit operates on a hyper-local model, so your physical location and stock readiness matter immensely.
Blinkit Seller Requirements
To become a verified partner, you typically need to meet the following criteria:
- Business Registration: You must be a registered business entity (Proprietorship, LLP, or Pvt Ltd).
- FSSAI License: Mandatory for any business selling food or edible items.
- GST Registration: A valid GSTIN is non-negotiable for Blinkit vendor onboarding.
- Active Bank Account: A current account in the business’s name for payouts.
- Product Stock: You must have ready inventory to supply Blinkit's partner warehouses or dark stores.
Document Checklist
Keep these handy to speed up your Blinkit seller registration:
- PAN Card (Business or Personal for proprietors)
- GST Certificate
- Cancelled Cheque
- Proof of Business Address (Utility bills or Rent Agreement)
- FSSAI Certificate (if applicable)
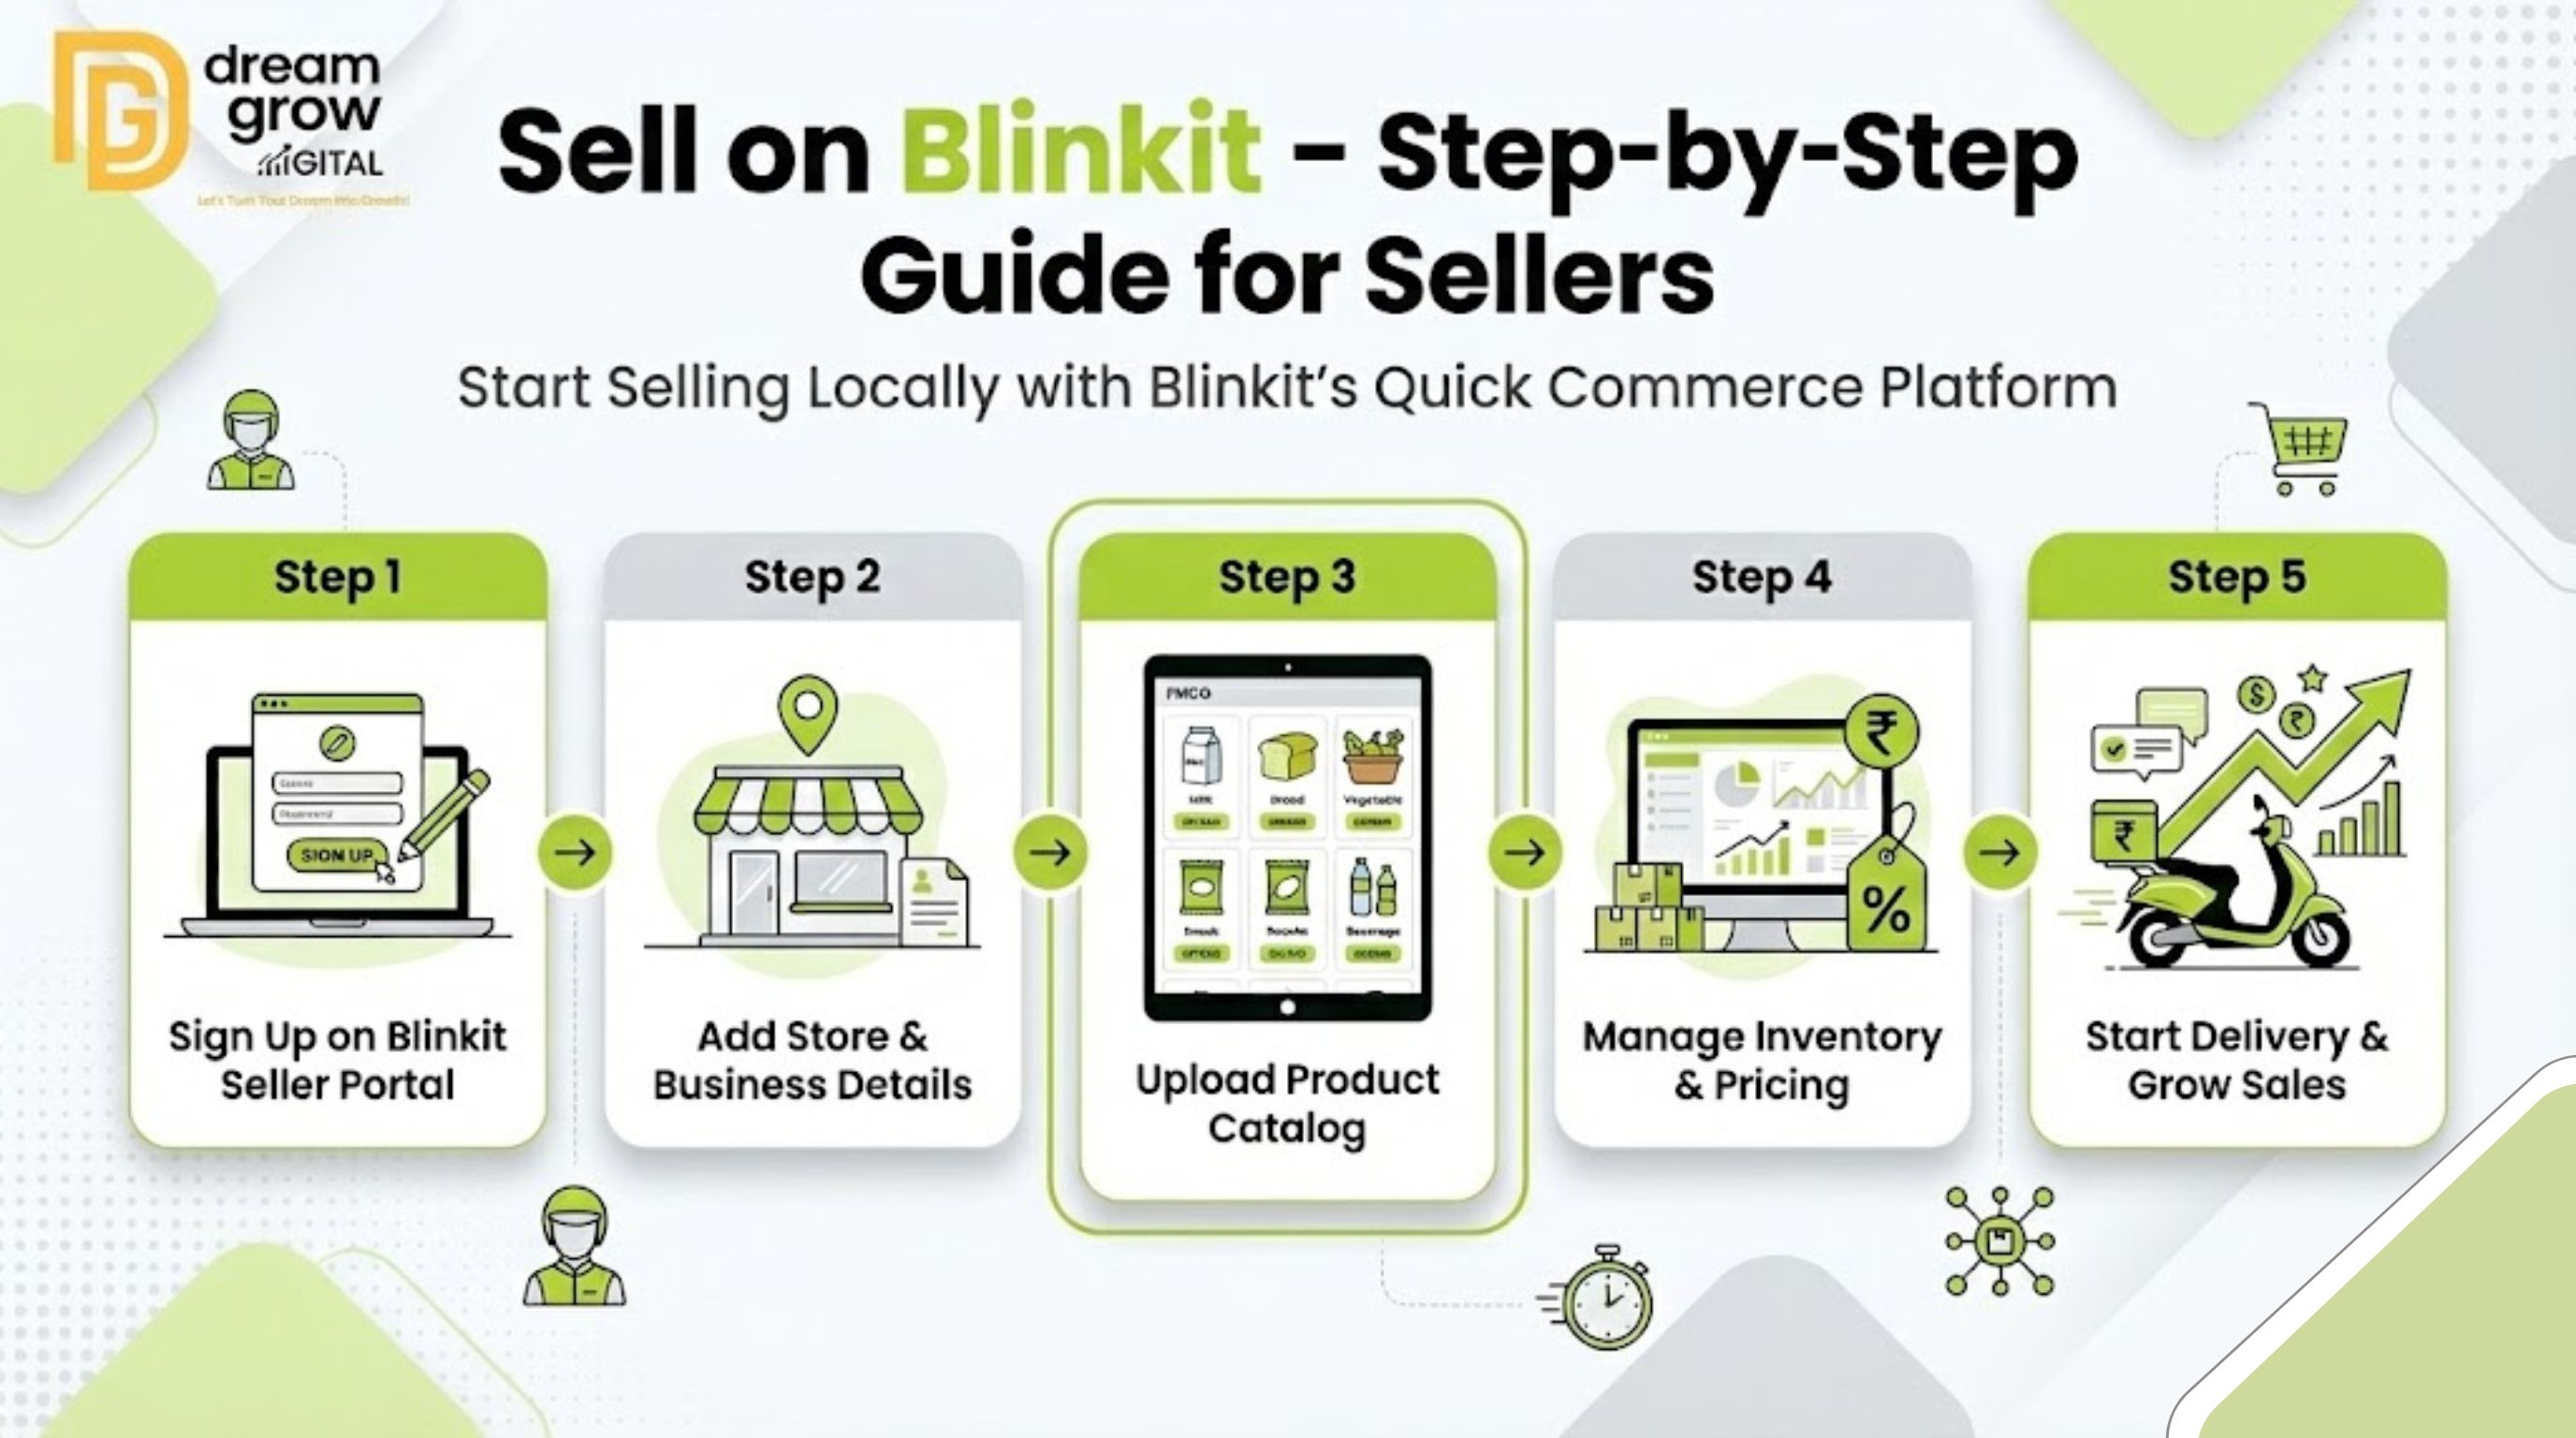
Step-by-Step Guide: How to Sell on Blinkit
Ready to get started? Follow this practical roadmap to launch your brand on the platform.
Step 1: Partner Registration
Visit the official Blinkit Seller Portal to initiate your application. Unlike open marketplaces like Amazon, Blinkit seller registration is often an approval-based process. You will need to fill out a partnership form detailing your brand, product categories, and supply capability.
Step 2: Brand Approval and Commercials
Once your application is submitted, the Blinkit category team reviews your brand. If your products align with their current demand, they will reach out to discuss the Blinkit seller commission structure. Commissions vary based on category, typically ranging from low percentages for staples to higher margins for premium goods.
Step 3: Cataloging and Listing
After commercial approval, you move to the Blinkit product listing services phase. You must provide high-resolution images and accurate descriptions. Since Blinkit is app-first, your images must be clean and your titles concise.
Step 4: Inventory Management
Understanding how Blinkit marketplace works is key here. You will likely need to send your stock to specific Blinkit warehouses or "dark stores" in your target cities. This ensures the 10-minute delivery promise is kept.
Step 5: Go Live
Once inventory is inwarded and QC (Quality Check) is cleared, your listing goes live on the app. You can now track sales via the Blinkit seller panel.
Dream Grow Digital: Your Partner in Marketplace Growth
Getting listed is just the first step; staying profitable is the real challenge. Many sellers struggle with complex cataloging, inventory reconciliation, and maintaining visibility.
Dream Grow Digital helps ecommerce brands with seamless onboarding, end-to-end account management, and strategic marketplace growth to ensure you dominate your category. From optimizing your keywords to managing daily operations, we bridge the gap between your brand and the quick-commerce consumer.
Practical Tips for Performance & Rankings
Simply listing products won't guarantee sales. To truly sell on Blinkit like a pro, you need to optimize for the algorithm.
- Stock Availability: Out-of-stock items are penalized heavily. Ensure you have a consistent supply chain.
- Competitive Pricing: Quick commerce users are price-sensitive. Use the Blinkit seller panel to monitor competitor pricing and offer competitive rates.
- High-Quality Imagery: Customers cannot touch the product. Ensure your main image is white-background and professionally shot.
- Bundle Products: Create combos (e.g., "Breakfast Kit") to increase your Average Order Value (AOV).
Common Mistakes Sellers Should Avoid
- Ignoring SEO: Even on Blinkit, keywords matter. Ensure your product title matches what users search for (e.g., "Organic Green Tea" vs. just "Green Tea").
- Poor Packaging: Quick delivery can be rough. Ensure your packaging is robust enough to handle rapid transit.
- Delaying Restocks: If you run out of stock during peak hours (like evenings), you lose ranking that takes weeks to recover.
Conclusion
Mastering how to sell on Blinkit offers a tremendous opportunity to scale your business in the age of instant gratification. By adhering to the Blinkit seller requirements, optimizing your catalog, and maintaining healthy stock levels, you can turn this platform into a significant revenue stream.
The quick commerce landscape is competitive, but you don't have to navigate it alone. If you are looking for professional guidance to fast-track your success, Dream Grow Digital is here to support your journey from registration to becoming a top-rated seller.
Frequently Asked Questions (FAQs)
Q1: Is there a specific fee to join Blinkit?
A: There is generally no upfront fee for Blinkit seller registration. However, you will pay a Blinkit seller commission on every successful sale, along with potential logistics or warehousing fees.
Q2: Can I sell from my own shop on Blinkit?
A: Blinkit primarily operates through its own dark stores to ensure speed. However, grocery selling on Blinkit for local retailers is sometimes facilitated through specific local partner programs. It is best to check the current operational model in your city.
Q3: How long does the onboarding process take?
A: The quick commerce selling guide timeline varies. If your documents are in order and your category is in demand, you can go live in 2-4 weeks.
Q4: How do I access the seller dashboard?
A: Once approved, you will be provided credentials for the Blinkit seller panel, where you can manage inventory, orders, and payments.